
The Track
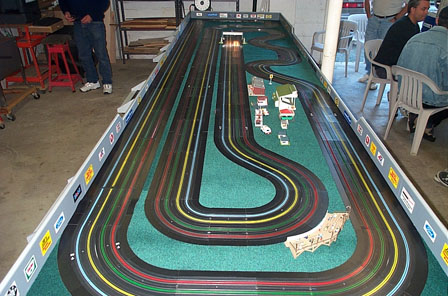 |
| This is the view
from one end of the track. You can see that John has some long straights
built into Octorara Hills. In the middle, and way down there, is
the custom built light gantry used for the TrackMate system that John
uses. The cars travel toward you from this perspective. Take
a look at the blue lane as it exits turn two. It's such a sharp
corner and a bad place to deslot, but an easy place to deslot if you're
not careful. A marshall would have this perspective to reslot a
car, but he would have to stretch to get to it causing the driver to loose
precious time. I know this from experience.
|
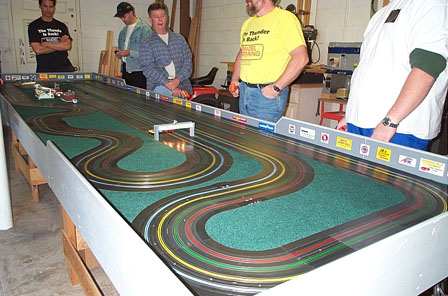 |
| This is the view
from the other side of the track. A race is about to start and the
four drivers stand ready. My teammate, JJ, is at the far right with
his head cut off. Moving down the table you see Charlie, Bob Edwards
of Thunder Engineering, Joe Hoopes, and Sam Johnston at the end, ready
to marshall. Coming towards us are turns 3, 4, and 5, which are
all pretty easy unless you're trading paint with someone. Turn 5
exits into the long 14' drag strip where it becomes readily apparent which
cars have the most balls.
|
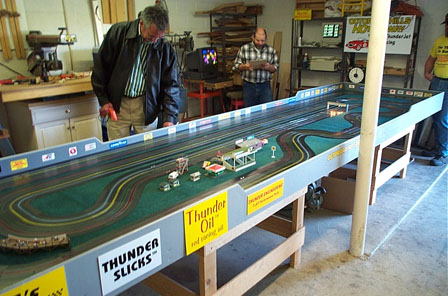 |
| Here's Kevin McEvoy
getting ready to run, while Smokey reviews the sheet for the upcoming
round. To Smokey's left is the computer running TrackMate and the
Gralab timer used for the races. I wish I got a better shot of the
curves in the snakey section by the pole. You'd see the blue lane
is stuck with the tightest curves. The red lane actually has the
inside of 2 6" curves very close togther, but at that point you've
already slowed down so they are not a problem. The blue, however,
takes a very nasty right hand 90 degree turn right after the fast sweeping
chicane, you really gotta get the car under control before hitting that
one.
|
| When Fergy gets
the new layout up on his site, I will link to it.
|
| >>Back to the Main Page<< |
Visitors to this page since October 28, 2000
©2000 Mr. Bigstuff
Octorara Hills Graphics created by John Forlino