
The Track
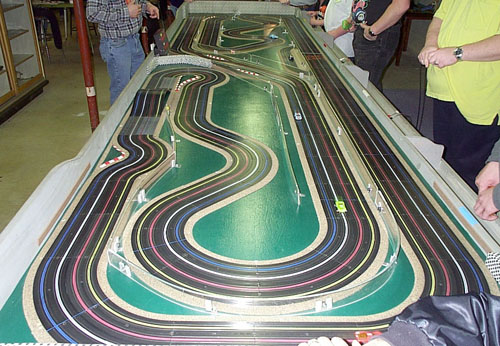 |
| This is the view from one end of the track. This
is the end of the course. Cars move left-to-right on the outer most
lanes and hit the main straight at the end of the lap. On the left
you can see that infamous bridge section.
|
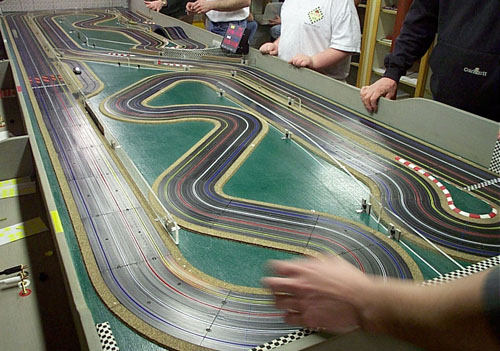 |
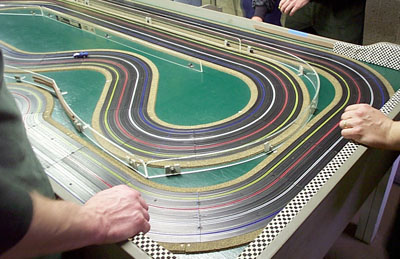
| This is the opposite view of the track. Turn
one is at the end of the main straightaway Barely visible entering
that turn is an orange (I think) car. These first six turns are
actually a popular place to de-slot. From some of the drivers' stations,
it's a little difficult to discern how tight the curves actually are.
|
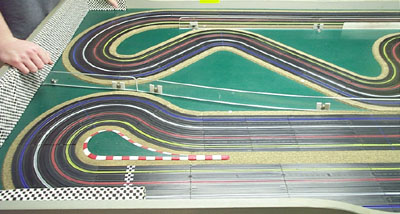 |
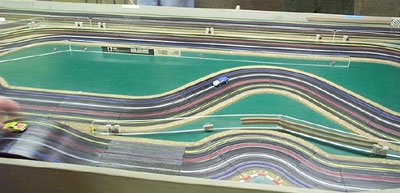
| If I count correctly, the bottom left is turn six.
Not surprisingly, the yellow lane is toughest here. The checkered
line just after the exit is where qualifying runs start. It's noteworthy
to mention the red and white "barriers". These are scratch
built from wood and fit the space perfectly. "Barrier"
is not really the right word, as they are rounded. A freewheeling car
would have no trouble running over it smoothly. The other checker
board pattern seen is fabric covered foam bumpers that completely cover
the back wall and 12" - 18" of each side. Accents like
this are found throughout the track.
|
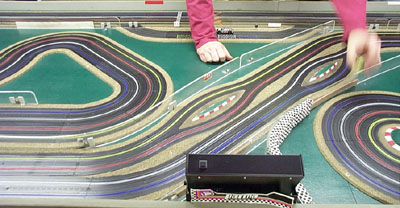 |
| The short straight that follows turn six, ends in
wide radius curves that dump you off into the Y-sections. If you
can't get the rear of you car in control here, you're in trouble. We
see more of the red/white wood borders here as well as a clear retaining
wall. The wall keeps any deslots confined to the area of the off,
keeping the deslotted cars from littering other sections of the course.
|
 |
| These three images must be viewed together. The
top image shows the exit from turn eight, which leads to a lazy, sweeping
turn and another simple curve. This all lulls the driver into all
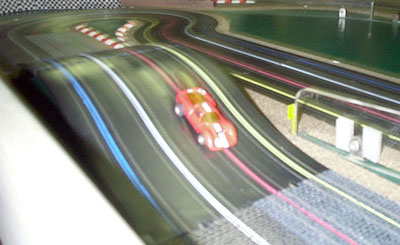
too false a sense of security. The middle image shows the worst
turn on the track. At the end of the short straight, the turn goes
right then quickly left. To the driver, it looks no different then
turn six, except the lanes are reversed. But you can plainly see
that this curve is much tighter in the initial bend to the right. Many
a T-Jet can be seen slamming into the wall (especially in the blue lane)
as the turn is taken without proper respect. The respect for that
corner is quickly and justly earned. But what comes next? Why
the bridge/hump section of course (with cobblestone tracks on either end
of it no less). I was surprised how easy it is to get a car airborne.
Finally, the bottom picture shows there's one last tight turn, immediately
after the hump, before you can get cranked into the final two curves (back
to the top picture) and fly down the straight to tick off your lap.
|
![]()
![]()
©2001 Mr. Bigstuff
Contact the webmaster.